hexo-next访客统计
9unk Lv5

设置 leancloud

  1. 注册 leancloud ,并验证邮箱。

  2. 打开控制台,点击 “创建应用”,这里的”应用名”自定义。

LC-1.png

LC-2.png

  1. 点击”存储”,新建 class。这里的class名称必须是”Counter”。为了让统计准确,这里 Counter 的权限设为 “无限制”

LC-3.png

LC-4.png

  1. 选择 “设置” –> “应用key”。记录 “App ID” 和 “App Key” 的内容
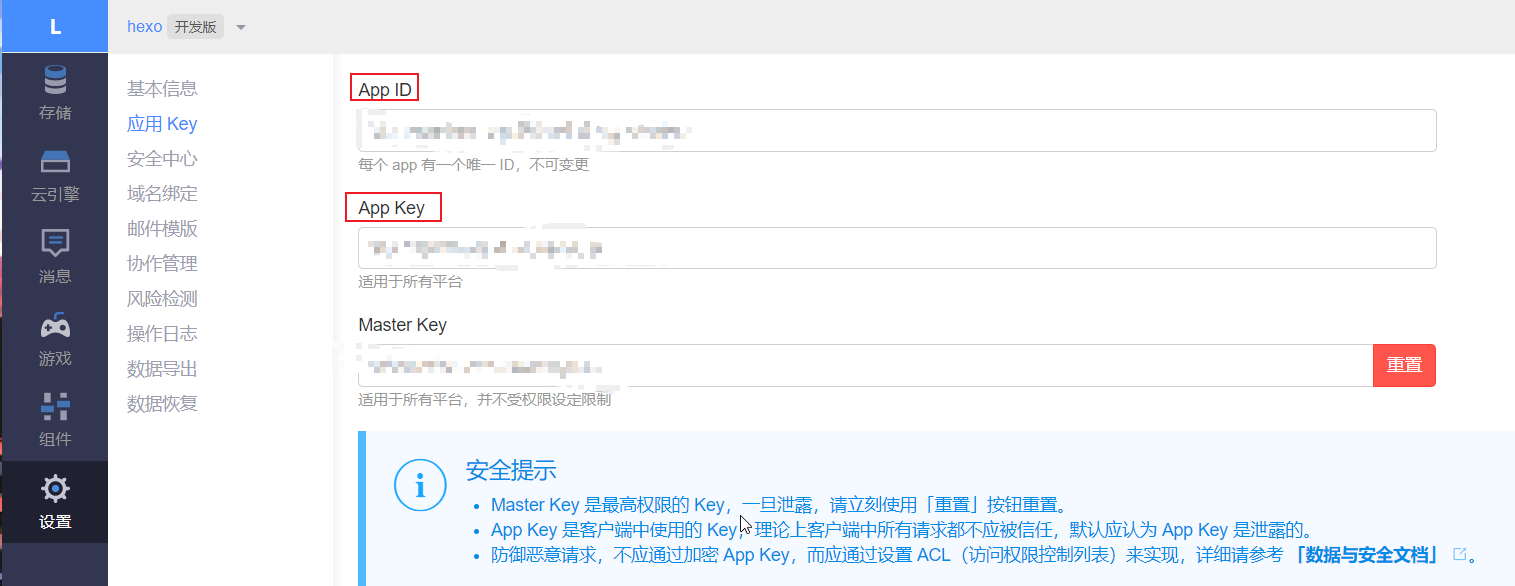
LC-5.png

设置 _config.yml

  1. 编辑 next 主题配置文件 _config.yml,搜索关键字 “leancloud_visitors” 并修改成如下内容:
1
2
3
4
5
6
7
8
9
leancloud_visitors:
enable: true
app_id: <<your app_id>>
app_key: <<your app_key>>
# Dependencies: https://github.com/theme-next/hexo-leancloud-counter-security
# If you don't care about security in leancloud counter and just want to use it directly
# (without hexo-leancloud-counter-security plugin), set `security` to `false`.
security: true
betterPerformance: false
  1. 开启 web 安全

此时的 AppID 以及 AppKey 是暴露在外的,为了保证自己的博客安全,建议开启 leancloud 的”Web安全选项”。在 “设置” –> “安全中心” –> “Web 安全域名” 中添加自己的域名。
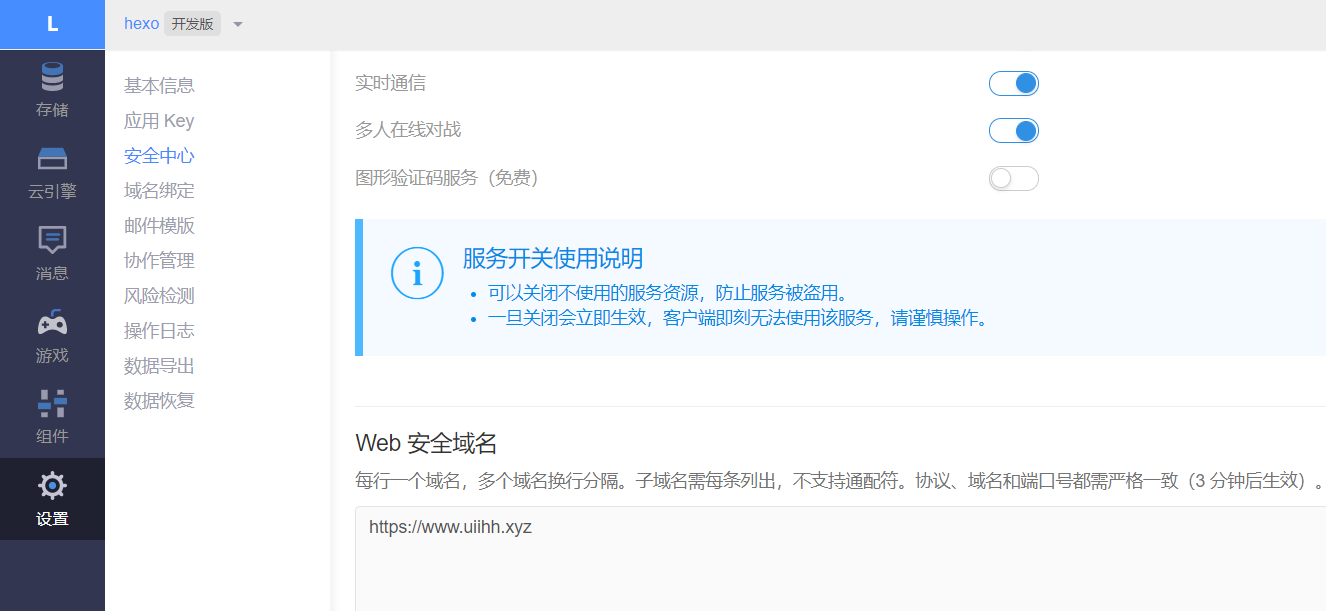
LC-6.png

  1. 最后 “Leancloud访客统计插件” 存在漏洞。

当你上传配置并登录网页后,文章下面标题会出现如下报错:

1
Error: 阅读次数:Counter not initialized! See more at console err msg.
  • 解决方法
  1. 将 “security” 选项设为 “false”。修改后的内容如下:
1
2
3
4
5
6
7
8
9
leancloud_visitors:
enable: true
app_id: <<your app_id>>
app_key: <<your app_key>>
# Dependencies: https://github.com/theme-next/hexo-leancloud-counter-security
# If you don't care about security in leancloud counter and just want to use it directly
# (without hexo-leancloud-counter-security plugin), set `security` to `false`.
security: false
betterPerformance: false
  1. 根据大神的博客,手动修复漏洞。

    Leancloud访客统计插件重大安全漏洞修复指南

reference

Hexo-Next搭建个人博客(添加统计访客量以及文章阅读量)

Leancloud访客统计插件重大安全漏洞修复指南

  • 本文标题:hexo-next访客统计
  • 本文作者:9unk
  • 创建时间:2019-08-31 20:29:25
  • 本文链接:https://9unkk.github.io/2019/08/31/hexo-next-fang-ke-tong-ji/
  • 版权声明:本博客所有文章除特别声明外,均采用 BY-NC-SA 许可协议。转载请注明出处!